Livin' in the Kitchen

Archive for July, 2011|Monthly archive page

Gardens and Cucumber Open Faced Sandwiches

In Fruit, Sandwiches on July 30, 2011 at 10:58 pm

Having a garden and working at a farm this summer has really made me realise that great food comes from beyond the kitchen. I admit I get a little more excited than the average-joe when I see cucumbers, parsley and tomatoes on my kitchen counter; but I can’t help it. Because with fresh cucumbers I can make a simple base that supports, enhances, and adds textures to an already fresh and crisp fruit.

Cucumber Open Faced Sandwiches
3 cucumbers, sliced thin
8 ounces cream cheese
1/2 package hidden valley ranch
1/2 teaspoon garlic powder
1 teaspoon dill weed
1/2 cup mayo
1/4 cup miracle whip
1 loaf rye cocoktail bread
Dill weed (for garnish)

Blend with hand-mixer: cream cheese, dressing, garlic powder, dill weed, mayo, miracle whip. Allow to sit in fridge to develope flavor (about 1 hour).
Spread the bread slices with the cream cheese picture, top with a cucumber and sprinkle the top with dill weed. Done!

Culinary Schools and Sugar Cookies

In Chicago, Cookies, Culinary Experiences on July 26, 2011 at 4:39 am

Today I visited The French Pastry school! I can’t really describe the feeling of being there better than this: I was in deep love. I am in deep love. And I will always be in deep love. During the school’s longest pastry program (6 months) students cover over 600 recipes in two different textbooks. Like I said, I’m in love. I made sugar cookies the other day and thought to myself : not a whole lot of things could light up my day more than a flower sugar cookie with sprinkles. These textbooks the exception.

Here’s the recipe I used… The reason I’m not posting it in full is because I followed it directly and just wasn’t impressed with the result. The cookies weren’t super moist and they didn’t make any further appeal by flavor. The cookies ended up serving as less of a treat I wanted to indulge in, and more of a canvas for art. I’ve yet to find my perfect royal icing recipe. I’ll keep trying. But in the mean time I can’t help but wondering; maybe it’s hidden somewhere in those 600 recipes.

Homemade Crackly Red Velvet Cookies

In Cookies on July 20, 2011 at 12:47 am

When I find a song I love I keep listening to it. Over, and over, and over again.
These cookies are like my favorite song obsessions, I just can’t get enough! The two differences?
a. Cookies have calories,
and
b. ‘Sweet Home Alabama’ has yet to make me feel like a fat fish.

Unlike song obsessions, truly good cookie obsessions never come to an end. Honestly, I could see myself replacing the original chocolate chip cookie with these. Now that’s a good cookie!

Red Velvet Cookies

1/2 cup butter
1/2 cup sugar
1/2 cup brown sugar
1 egg
1 teaspoon vanilla
1 1/2 cups all purpose flour
1 teaspoon baking soda
1 teaspoon salt
1/3 cup cocoa powder
1 teaspoon red food coloring
3/4 cup milk chocolate chips
1/2 cup white chocolate chips

Preheat oven to 375.
Mix butter and sugars together.
Add the egg and beat for about a minute, add food coloring. (I was out of red, so I used this marroon-looking color and it worked fine!)
Add dry and mix until just incorrporated
Fold in chocolate chips.
Lay parchment paper over 2 cookie sheets.
Roll cookie dough, this should make around 16-20.
Bake 15 minutes, NO MORE, NO LESS! These will look crackly, and the insides will look like brownies not quite done. Trust me, once they cool off and you bite into them, you’ll know you took them out at the right time. Take the sheets of parchment paper off the trays immediately.

Enjoy!

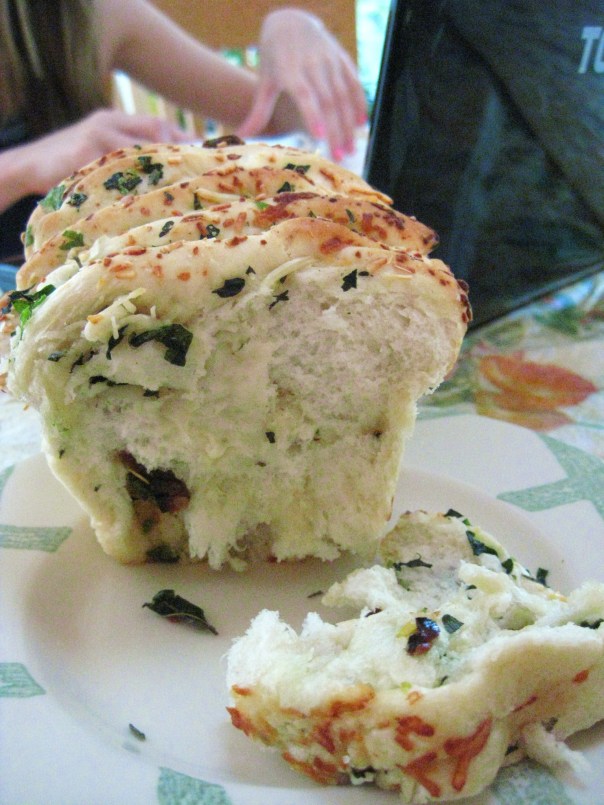
Cheese, Herb, and Garlic Pull-Apart Bread

In Bread on July 18, 2011 at 5:04 pm

 I don’t particularly like lists; especially when unappealing things are added to them. Which is why, when my mom told me I had to go water the  garden, I set out stubbornly into the blistering heat. It didn’t much help my glowing attitude when I turned the wrong knob, went out to the garden, and waited for three minutes until I decided that the water just wasn’t coming. Instead the water had been streaming from a different hose, pointing to our forgotten herb garden.

This bread is absolutely delicious and has so much flavor! The fresh herbs brought a lot to it, but the garlic is the star! You can play around with the filling. You’re in complete control of the flavor! Remember while you’re making it, it doesn’t make a whole lot. So I’d recommend doubling it! I made this last night and there’s only two pieces left.

Cheese, Herb, and Garlic Pull-Apart Bread
Slightly adapted from Petite Kitchenesse
Bread
3 cups of all-purpose flour
1 cup of warm water
1 packet of yeast (2¼ tsp.)
1/3 cup of sugar
1 tsp salt
2 tbsp butter, melted

Filling

1 bulb (Yes, I mean an entire bulb) of garlic
3/4 cup fresh herbs (basil, dill, rosemary, parsley, sage. Feel free to combine with dry herbs, too.)
1 cup cheese (I used 1/2 cup parmesan, 1/4 mozzarella, and 1/4 cheddar)
2 1/2 tablespoons butter, melted

Do ahead for filling: Preheat oven to 400F and cut the top off the garlic bulb. Roast for 40 minutes- 1 hour.
Bread instructions:  Combine warm water, sugar, and yeast in a large bowl. Let sit until foamy, about 8 minutes.
Add butter and salt to yeast mixture, sift flour 1 cup at a time into yeast mixture, stirring after each incorporation.
Knead the dough on a floured surface until smooth, about 8-10 minutes.
Place dough in an oiled bowl, set a damp towel on top, put bowl in a warm place and allow to rise for 1 hr or until doubled.
After an 1 hr, punch the dough, knead a few times on a well floured surface, and let rest for 5 minutes.

Filling Instructions
Cut leaves off of your fresh herbs into small pieces.
Melt butter in sauce pan and add your herbs.
Squeeze out the garlic cloves and add to the butter and herbs.
Grate your cheeses and set aside.
Roll out the dough that has just sat resting for 5 minutes. Roll into a large rectangle until the dough is about 1/4-1/2 inch thick.
Spoon the butter mixture over the dough, reaching all corners. Sprinkle the cheeses over the top. Then cut with a sharp knife into small squares.


Have 2-3 mini loaf pans buttered and read
Start layering the squares on each other until the bread pan has been filled. *I used up all the space in my pans before I even let them rise. It worked, but it was harder to pull the bread apart. Give the bread room to grow!
If you’d like and have a little extra cheese, herbs, or garlic, sprinkle this over the top of the bread.
Put a damp towel on the bread and allow it to sit for another 40 minutes.
Preheat oven 350F and bake 15-18 minutes.

Enjoy!!

Cake-y Banana Cookies and Conquering Fears

In Cookies on July 17, 2011 at 7:12 pm

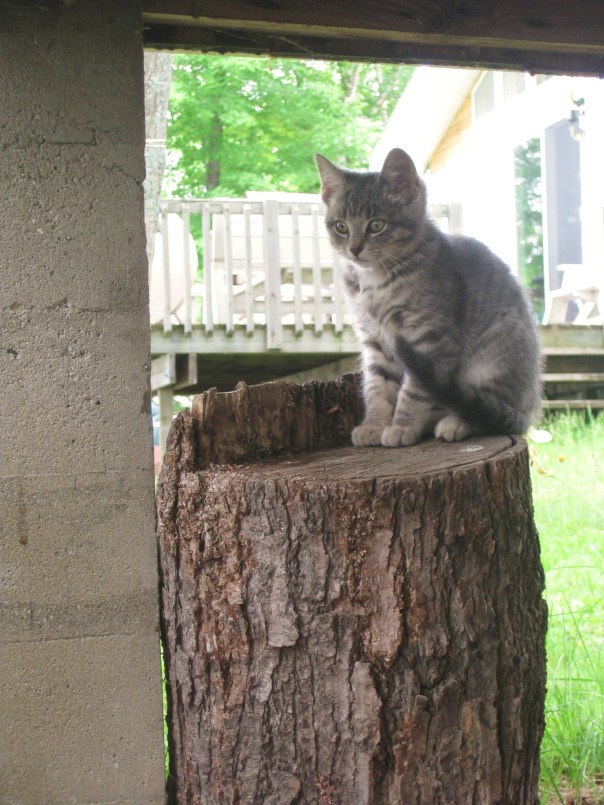
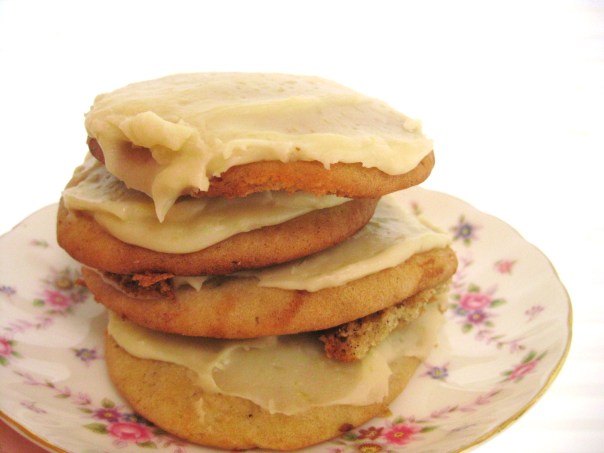
I sat next to a kitten, an animal I feared more than spiders, for a 6 hour car ride home from our cabin. I zip lined without being afraid of falling. I went to camp and met a girl who spoke from one of the purest hearts I’ve ever heard,  and we listened as she shared the hopelessly hard life she leads on the south side of Chicago. We all have fears and imperfections, take them away and you see who a person really is. Which is how I felt about these cake-y banana cookies. They weren’t true to their flavor with frosting, so why add it?

These are absolutely delicious and just like banana bread, only in cookie-form! They’re moist and soft, but still have the strong taste of banana bread. I even had one for breakfast with some eggs. Why not, right?

Banana Cake Cookies
Me
2 3/4 cups flour
1 cup butter (2 sticks), cut into small chunks
1/2 teaspoon salt
1/2 teaspoon (heaping) baking soda
3/4 cup white sugar
1/2 cup brown sugar
2 teaspoon vanilla extract
2 hard boiled eggs, peeled and diced finely
3 medium bananas

Preheat oven 350F
Use a food processor
Pulse together the flour and butter until the butter has formed small balls
Add the peeled bananas, sugars, vanilla extract, boiled eggs, salt and baking soda.
Pulse until everything just comes together, take out blade and fold the mixture together to make sure everything has been fully incorporated.
Line pans with parchment, use a tablespoon to scoop balls onto the sheets(they will still be very batter-y, this is how they should be!)
In middle of the oven, bake a pan for 15 minutes. No shorter, no longer!
*These won’t feel completely done when they come out, let them sit on the sheet trays until they’ve cooled!

These taste exactly like banana bread, but have that soft moist texture of banana cake. They’re like whoopie pies, only without the unappealing (I think) sponge texture that a lot of the recipes have. Now, whenever we have people over for easter or for brunch, I’ll make these! It’s amazing how much easier it is to serve a cookie than a piece of bread!

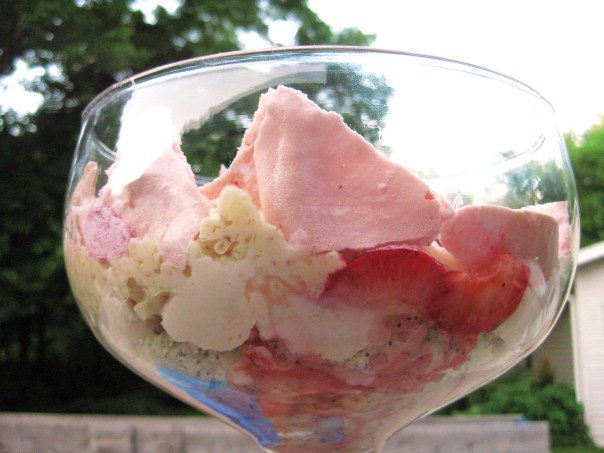
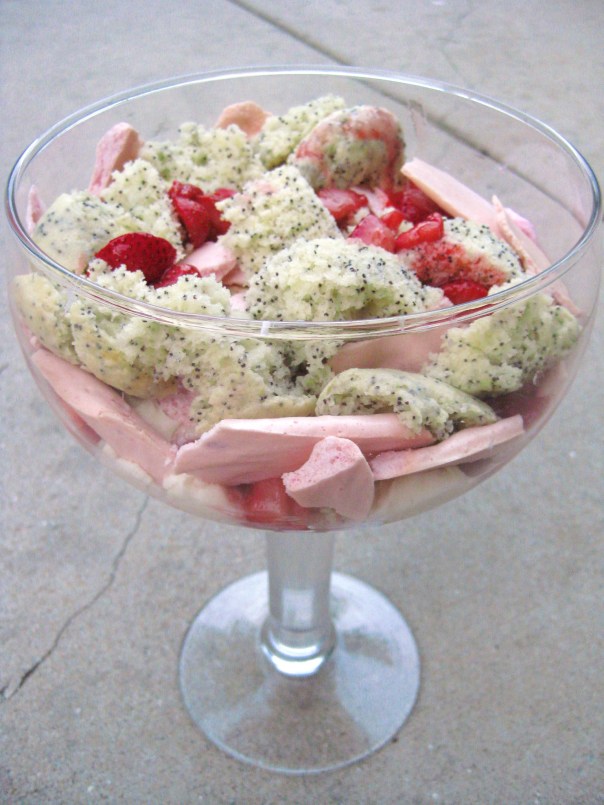
White Chocolate Stawberry Trifle with Lemon Poppy Seed Muffins

In Trifles on July 9, 2011 at 6:39 am

My twin brother holds the running title of ‘most uneducated food critic’ in our house. It’s not that he doesn’t try everything, because he does. But clearly his food-rating scale is a little off kilter at times… When the family rates something a 7 out of 10, Ryan is rating a 4.  With him, I find myself hoping for a 5. It’s quite frustrating, too, to  have someone who’s so close to me not fully appreciating all the work and effort that goes into just one step. In this case I had 8, check it out:

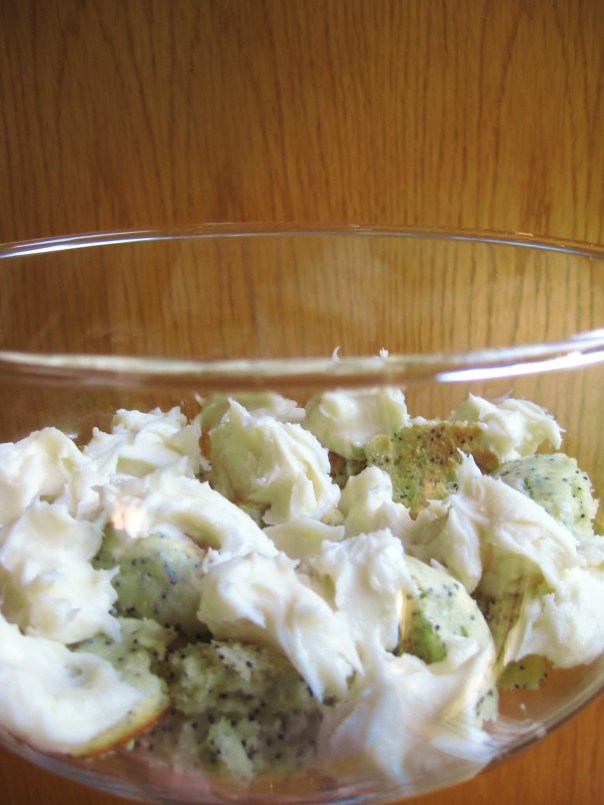
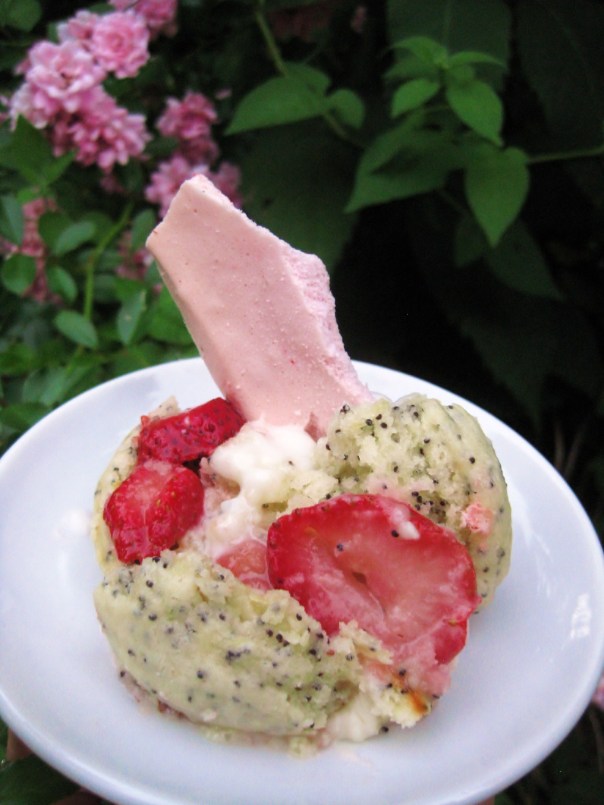
Right as I was finishing the last of the pictures, as always, Ryan snagged the plate to try some. He sat at the table and with the flick of his fork he said, it’s a ten. Man, let me tell you, that fork sent me flying. Hours, days, years of life, work, and sweat were devoted to getting that kid to say those three words about dessert. He said that the flavors all complimented eachother nicely. I think I felt the most proud because I didn’t use a recipe for the trifle. I made a flavor palate that I thought would suit my family and use up the fruit I knew wouldn’t be used for a week.  My used-to-be-flawed critic loved it and so did the rest of my family. And that’s how a fork sent me flying.

Lemon Poppy Seed Muffins

Instead of going with a lemon poppy seed pound cake, I went with the muffins so that the Trifle wouldn’t become too sweet! And I’m so glad I did! I used my favorite kind of lemon poppy seed muffins! I made a few changes, though. Juiced an entire lemon instead of a mere 1 1/2 teaspoons. I also used sour cream instead of greek yogurt. The muffins came out perfect!

Also make the topping, and use it as garnish on the top of the trifle!

When the muffins come out, allow to cool. *Do not start assembling trifle until prepared to serve, with everything made and prepared to go* When ready, you’ll first rip or cut the muffins into pieces, and sprinkle along the entire bottom of the glass.

Cool White Chocolate

I threw this recipe together and honestly didn’t really think to measure anything, but here’s the ingredients about how much I think I put it. I melted 5 blocks of White Chocolate Almond Bark then added about 3/4- 1 cup powdered sugar and stirred with a hand mixer until the bowl filled with small snowball-looking balls. Next I added about 1 tablespoon- don’t skimp- of pure vanilla extract, and 2 tablespoons butter, then mix in about 1/2 cup sour cream.

When ready, glop this with a spoon over the muffins. Again, do not start until everything has been prepared.

Strawberries

Here’s where you’re making up for all that sweetness that’s already gone into the Trifle. Strawberries are naturally sweet, so you don’t need to add much to them. I threw about 13 good-sized cut-up strawberries into a saucepan on medium-high heat and tossed them with about 1 – 2 tablespoons of sugar, 1 tablespoon fresh lemon juice, and 1/2 teaspoon vanilla.

Spoon the strawberries over the White Chocolate mixture, you can spoon a little of the juice on top of the strawberries, but it doesn’t look the best for presentation if all the juice is at the bottom. Plus it will taste soggy much faster. Reserve strawberry juice for topping/plating.

Tapioca

Right about now, I was super tired. I’d just baked muffins, and been cleaning up the kitchen, there were more dishes to do and I was remembering how bad I needed to jog. Which is why, I used packaged tapioca. The kind that you make on the stove. But I’m condemned. I didn’t realize that then, now I do. Whenever I make something from a package, it doesn’t seem to go right. Luckily, I saved the tapioca that was burning on my stove and it still tasted just as good. Don’t get me wrong, it’s not homemade, but it was a major star of the dish. 

Strawberry Meringue

Here I wanted something that wasn’t artificial flavors like the recipes online. So I went for it. I went with: 1/2 cup egg whites, 1/4 teaspoon cream of tartar, 1 cup of powdered sugar, 2 teaspoons pure vanilla extract, and the juice from about 6 strawberries. I mixed the egg whites until frothy then added the cream of tartar, powdered sugar, then the juice. Don’t over mix, only mix until peaks form, then turn off straight away. Bake in a 250F oven for about 1 hr. Then, 30 minutes in, flip the sheet so the back faces the front. Since I’m impatient, I allowed mine to cool for about 10 minutes. The middle didn’t seem to work as well as the outsides, but then again, I didn’t expect them to! Honestly, throwing in so much extra liquid, I was happy it worked at all. Plus, it tasted delish! You can’t skip out on this step.

When ready, break into pieces and lay in elaborate ways on top of the strawberries. It looks cool when you slant them on the walls of the trifle dish so that you can see what’s underneath the layer! Save a few to garnish the top with later!

No more baking!

Now that you’ve spent all those hours making things, it’s time to throw it together! Just keep layering the trifle! I only did it once, then added more muffin, strawberries on top of that *along with about half their juice*, and the muffin lemon topping. I’m not going to lie, this is one of the longer recipes. But it’s one you can’t miss out on!
Banana Cupcakes with Cream Cheese Frosting

In Cupcakes on July 7, 2011 at 4:13 am

This past week I was in Michigan with Lizzie! Remember our former sushi-hater?

In MI we got to spend half a day in a little Amish town! Given 20 dollars, I was a little concerned I wouldn’t find anything I wanted more than baked Amish goods. Fortunately for my treadmill, I found a gorgeous pair of earrings that wiped out most of my funds. Unfortunately for Liz, I found pearl sprinkles that I just could not live without which she happily agreed to help me buy.

Some day when I actually earn money, I think instead of paying for a car, I’ll still be paying off all the scones, sprinkles, and Starbucks drinks that I just could not live without.  An Amish guy about our age rang up the sprinkles and I had to think: what do teenage Amish guys save for? Buggies?

The minute I got home (You think I’m kidding. I’m not.) I started baking. Four days without baking is four days too long.

Banana Cupcakes with Cream Cheese Frosting
Recipe from recipezaar.com
1 1/2 cups bananas mashed, ripe
2 teaspoons fresh lemon juice
3 cups flour
1 1/2 teaspoons baking soda
1/4 teaspoon salt
3/4 cup butter, softened
2 1/8 cups sugar
3 large eggs
2 teaspoons vanilla
1 1/2 cups buttermilk

Preheat oven to 275F
Mash bananas (about 4 medium bananas) then stir in lemon juice.
In a medium bowl, mix the flour, baking soda, and salt. Set aside.
Cream the butter and sugar, when fluffy, add eggs one at a time, then add vanilla and stop mixing.
Slowly mix in flour mixture and buttermilk, alternating.
Stir in banana mixture, scoop into baking tins.
Bake for 45-60 minutes.

Cream Cheese Frosting
1/2 cup softed butter
1 (8oz) package cream cheese
1 teaspoon vanilla extract
3 1/2 cups powdered sugar

Cream the butter and cream cheese
Add the powdered sugar slowly, then cream.
Add vanilla, and cream again.
Frost, done!